- Open SENuke TNG app
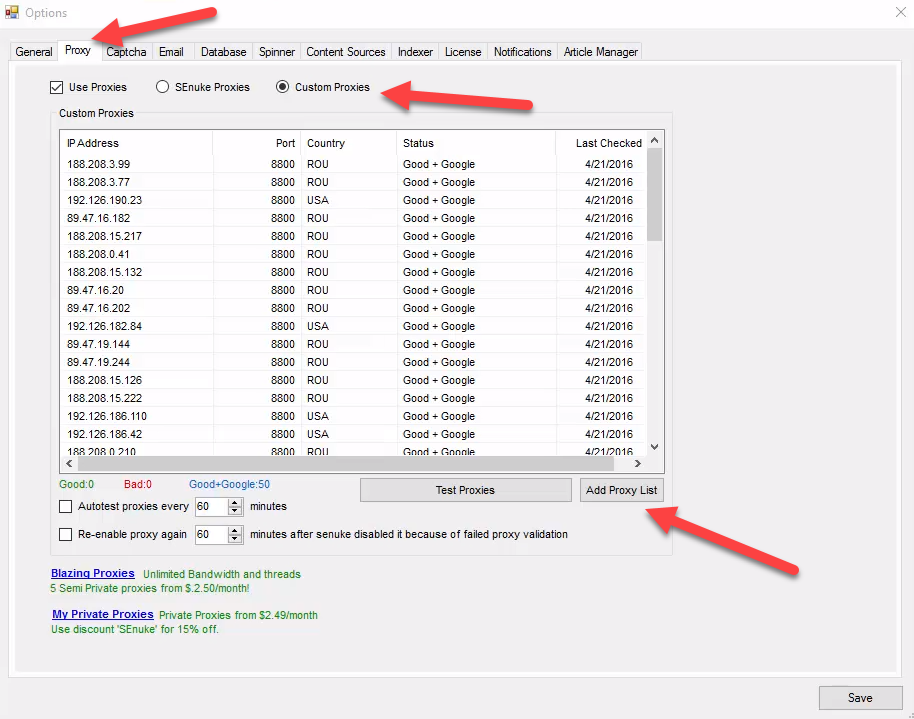
- Click on Options button
- Go to Proxy tab. On this tab click on "Add Proxy List" button

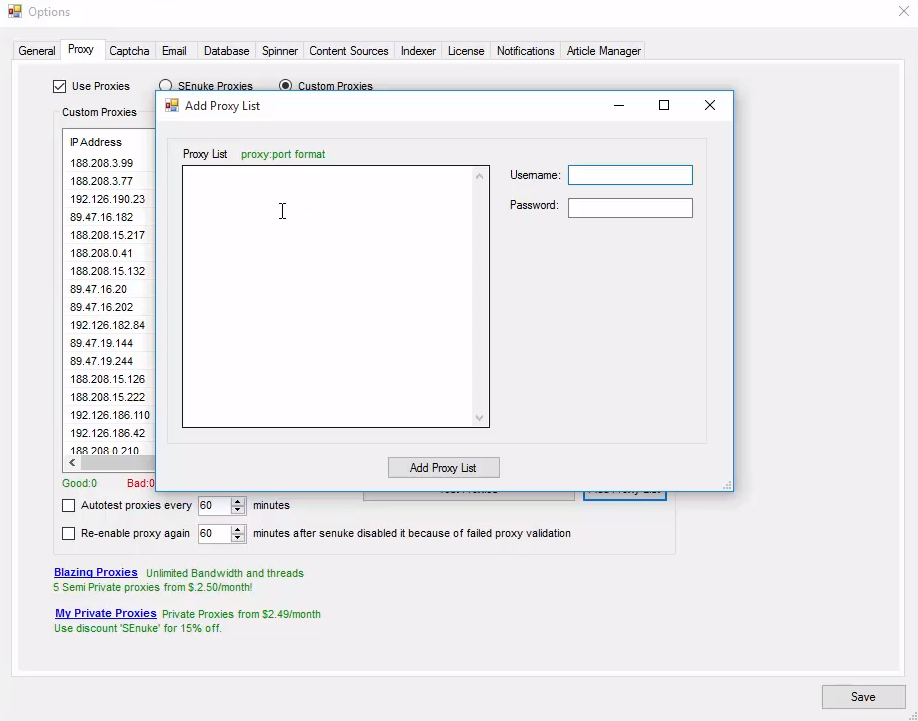
- In opened window you need to put data from your proxy list. You should use Export Proxy List feature on your Froxy Dashboard. Notice: you need to export proxy list in correct format (server/IP:port). After inserting data from you Froxy Dashboard to SENuke TNG you also need to fill username and password. You can also get this information from your Froxy Dashboard

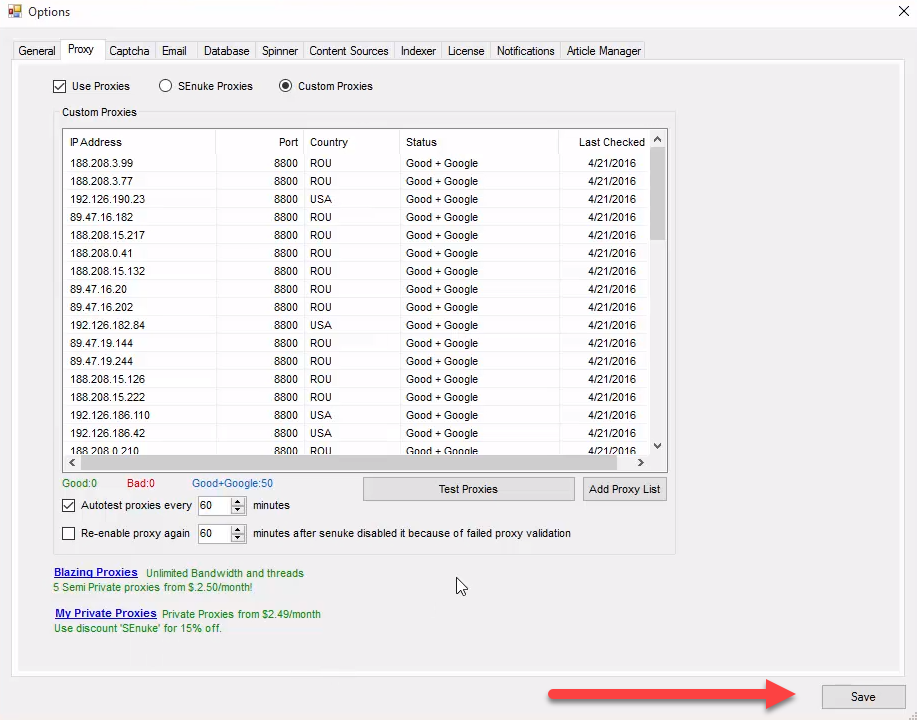
- To apply all changes click on "Save" button

- Now you can use Froxy proxies with SENuke TNG!
SEO Tools
SENuke TNG
Enhance SENuke TNG with proxies that deliver accurate, region-specific insights and unrestricted access to competitor data. Secure operations with IP diversity and optimized connectivity.

Succeed at Your Business
Get Started with Froxy for SEO
Froxy’s proxies give you unfettered access to valuable SEO data and tools. Whether you analyze competitors or track performance, our solutions ensure reliability and scalability.
Start optimizing your SEO efforts with our proxies today. Choose a plan that suits your business.
Start optimizing your SEO efforts with our proxies today. Choose a plan that suits your business.